
This Excel tutorial explains how to create Relationship and create Pivot Table using PowerPivot.
You may also want to read:
Create Relationship in Microsoft Access
PowerPivot in Excel
In Excel version 2016, PowerPivot is pre-installed and you can see the option in the ribbon tab.

For previous versions of Excel, some versions cannot support PowerPivot. If you are not using Excel 2016, I recommend you to google search how you can install PowerPivot in your version, you may need to download Add-In.
In this post, I will demonstrate how to use PowerPivot in Excel 2016 to build relationship among different tables and then use fields from different tables in Pivot Table.
Create Pivot Table using PowerPivot – Example
Suppose our goal is to create a Pivot Table as below. Amount, Salary and Bonus come from 3 different Tables, we want a single Pivot Table to be able to select fields from 3 different Tables.
| Department | Sum of Amount | Sum of Salary | Sum of Bonus |
| Finance | 180000 | 60000 | 63000 |
| HR | 120000 | 40000 | 42000 |
| Grand Total | 300000 | 100000 | 105000 |
Step 1: Create Table
Suppose we have three worksheets, each worksheet has a set of data.
In Worksheet Salary, it contains the salary of each employee.

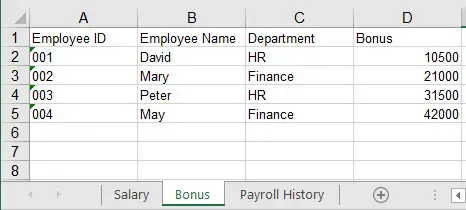
In Worksheet Bonus, it contains the bonus of each employee.
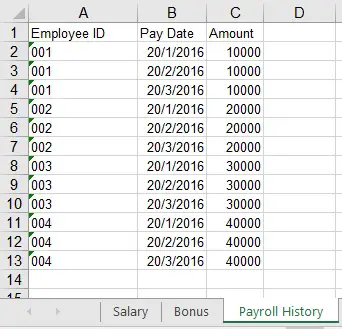
In Worksheet Payroll History, it contains the payroll history of each employee in 2016. Each employee has multiple records.
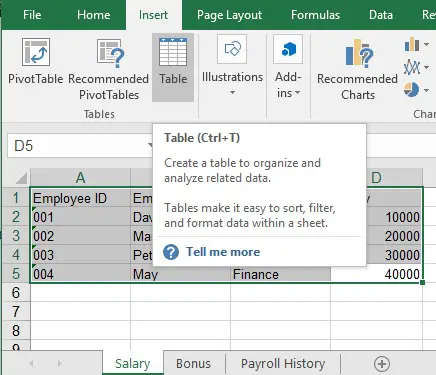
Now create Table for each data set. For example, in Salary Worksheet, select all data, then navigate to Insert tab > Table
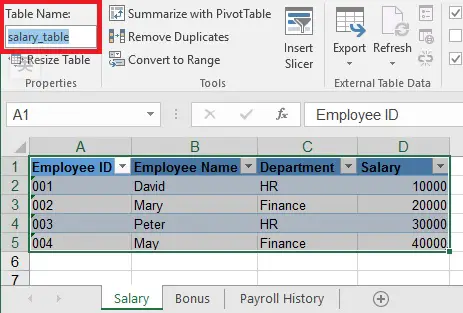
Name the table as salary_table
Repeat the create Table step for the other two data sets, rename them as bonus_table and payroll_table.
Step 2: Add Table to PowerPivot
To add a Table to PowerPivot, select any Cell in a Table, navigate to Power Pivot tab > Add to Data Model
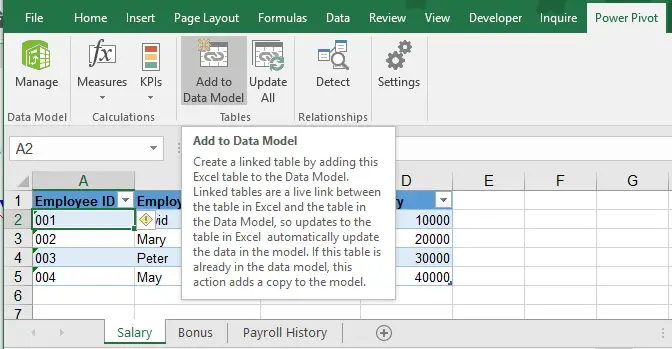
A new Windows called Power Pivot for Excel is popped up, it looks like an Excel Workbook but it is a Windows to manage PowerPivot data. Now salay_table is added to this Windows.

Repeat the same steps for bonus_table and payroll_table.
If you accidentally close the Power Pivot for Excel Windows , navigate to Power Pivot tab > Manage
Step 3: Create Relationship in PowerPivot
Navigate to the Power Pivot for Excel Windows > Home tab > Diagram View

To create Relationship among these three Tables, use common key Employee ID field:
First, drag Employee ID field of payroll_table to Employee ID field of salary_table.
Then drag Employee ID field of bonus_table to Employee ID field of salary_table.
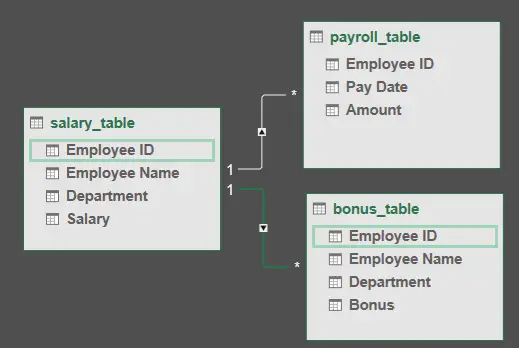
As you can see from the above diagram, the field you drag from will build a “Many” Relationship (display as *), the field you drag to will have a “One” Relationship (display as 1). This relationship cannot be edited, it all depends on the direction you drag the key field. There is no such thing as Many to Many or One to One in PowerPivot.
In addition, you won’t be able to see which key field you have joined the two Tables, the * and 1 are not located besides the key fields.
So how to decide which table is Many and which table is 1? The Many table can be seen as a lookup table, from which you want to get the value. It can contain multiple records for each key (Employee ID), this is true for payroll_table. For bonus_table, in fact it should be a 1 to 1 Relationship with salary_table, but since we cannot choose 1 to 1 Relationship in the diagram, we can only use 1 to Many Relationship.
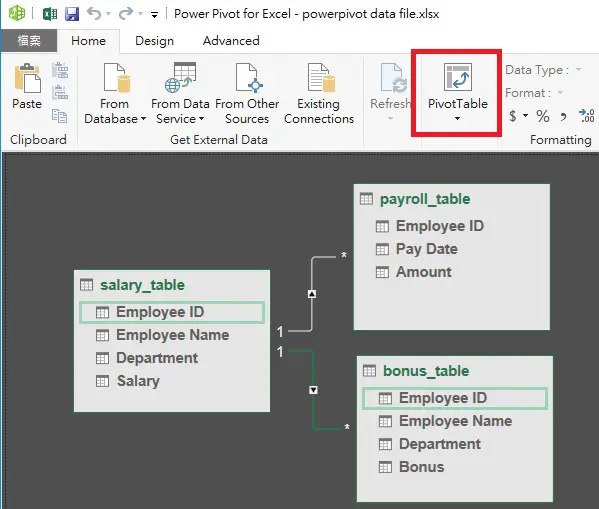
Step 4: Create Pivot Table using PowerPivot
To create Pivot Table using PowerPivot, navigate to Home tab > PivotTable
Create Pivot Table in new Worksheet. On the right hand side, you can select from all three Tables we just created Relationship, expand the tables to select fields.
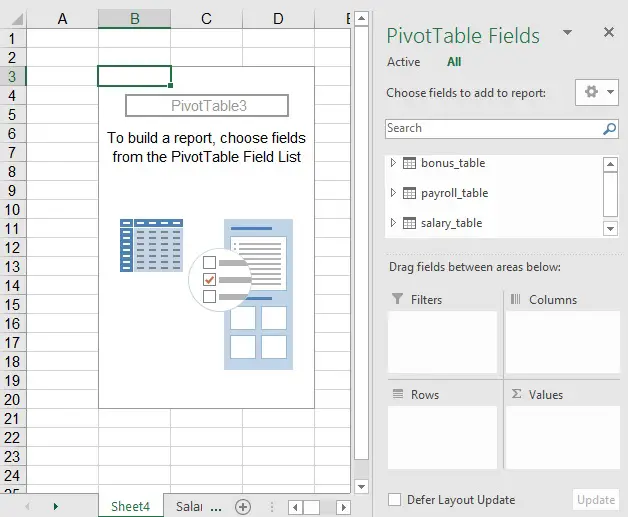
Select fields as below, now we have achieved our goal.
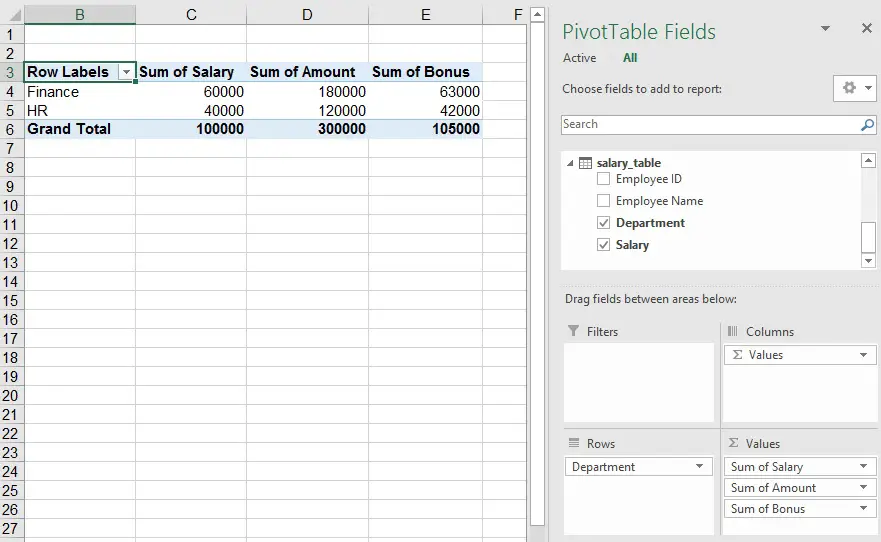
IMPORTANT:
for the Rows, you have to select field from Table of “1” Relationship (salary_table); otherwise you would receive an error message Relationships between tables may be needed.
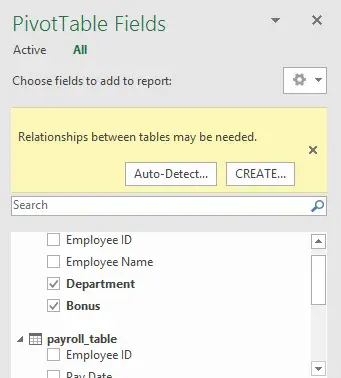
Next time when you see this error message in other scenario, check the direction of the Relationship whether it is mistakenly reversed, or you use the wrong field in Rows.