This Microsoft Excel tutorial explains how to create Excel Query, create Join Table, update Query, add Query criteria.
You may also want to read:
Excel automatically select specific columns using Custom Views and Query
Microsoft Excel create Query
Similar to Microsoft Access Query, Excel allows users to create Query through graphical user interface, which means you don’t need to have technical skills to write any SQL statement. Although Microsoft Excel has the capability to do that, Access undeniably provides a much easier way to build Query because
- You can create Expression and apply criteria on it
- You can create SubQuery
- You can build many different relationships with different types of Joins in a single Query
Therefore, if you really want to build complicated Query, you should use Access to link table back to Excel data.
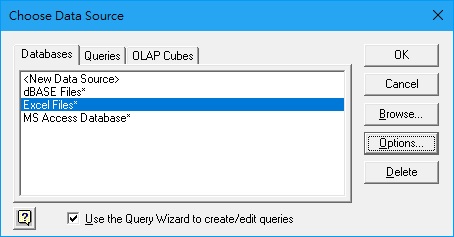
To begin, navigate to Data > From Other Sources > From Microsoft Query
Select Excel Files > OK
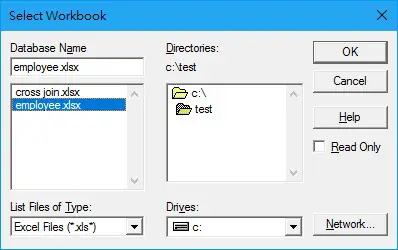
Select the workbook that contains the data. You can select Workbook that you are currently opening > OK
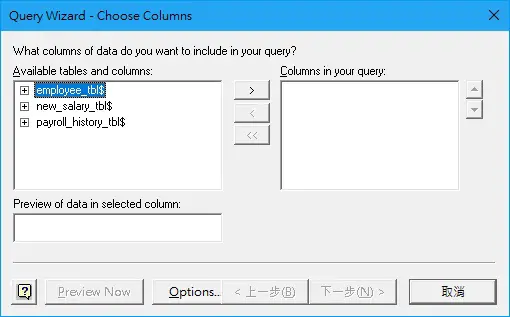
Select the worksheet, and then add the fields you need to the right panel (click on the arrow in the middle)
If you cannot see the Worksheet names, click on Options button and check System Tables check box.
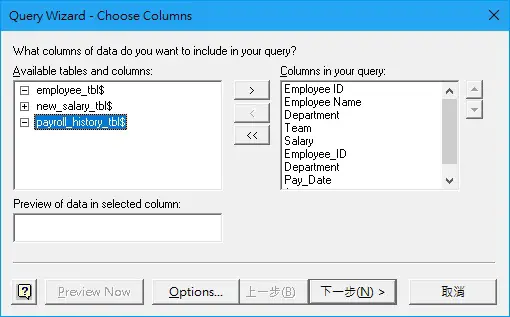
In this example, I have selected all the fields under worksheet employee_tbl and payroll_history_tbl. Click on Next.
The below message box pops up saying you have to join the Table by yourself. It doesn’t matter because I don’t want Excel to guess what I want to join.
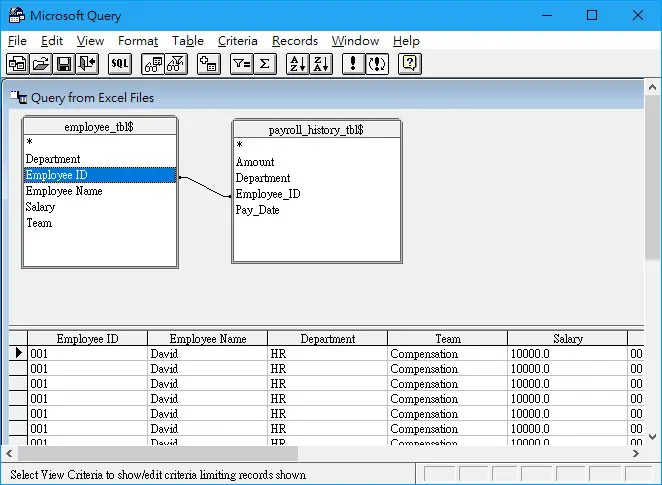
Because Employee ID is the only key in these two Table, I drag the Employee ID field of one Table to Employee ID field of the other Table in order to create an Inner Join.
The result is immediately displayed in the lower table.
In the previous step, I have selected all the fields from two Tables, therefore some fields such as Employee ID and Department are duplicated. Highlight the fields you want to remove from the result, click on Delete button on the keyboard.
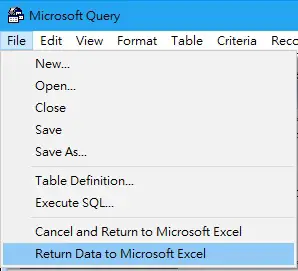
To return Query result, navigate to File > Return Data to Microsoft Excel
Select a Cell you want to return data > OK
Now data is returned. When the data source is updated, you can refresh this table by clicking Data tab > Refresh All
Edit Excel Query
To edit Excel Query, right click on the Table in the worksheet > Table > Edit Query
Go through the Wizard Query to select fields > add criteria > sort data > edit Query
Alternatively, cancel the Wizard Query to directly jump to the Query view.
Add Table and Delete Table in Excel Query
It is possible to join additional tables from another source (must be under the same folder, same file type) by clicking on the Add Table button in the tool bar.
However, if you have more than 2 Tables, you cannot create Left Join or Right Join, you can only create Inner Join.
To delete a Table, click on t he Table and press the Delete button on your keyboard.
Add Criteria to Excel Query
To Add criteria, click on the Show/Hide Criteria button in the tool bar, select the Criteria Field and enter a Value.
If you have more than one criteria, type all criteria in the same Value row if they are AND condition.
Type all criteria in different Value row if they are OR condition.
Create Right Join and Left Join
By default, when you drag one field from one Table to another field, the relationship built is Inner Join (return result where both keys are matched).
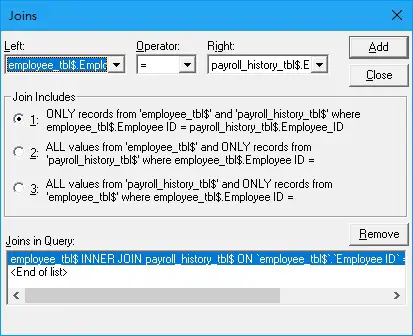
Instead of creating Inner Join, you can double click on the relationship line to open the Joins dialog.
The first option is Inner Join, 2nd option is Left Join, 3rd option is Right Join.
For Inner Join, the relationship line is a straight line without any arrow.
For Left Join, the relationship line will show an arrow pointing from table that includes all fields to another table.
For Right Join, the relationship line will show an arrow pointing to table that includes all fields from another table.
Select an option, then Click on Add button, the SQL statement in the lower box will update accordingly, press Close button to finish editing.


