This Excel tutorial explains how to create Data Validation (drop down box) and Combo Box (Form Control / ActiveX Control).
You may also want to read:
Excel Indirect Function to convert text to Reference
Excel difference between Form Controls vs ActiveX Controls
Excel Data Validation and Combo Box
If you want to design an Excel template to restrict users to input specific values instead of free text, you need to create a drop down box for users to choose values from.
There are three kinds o f drop down box in Excel (in order of difficulty)
– Data Validation
– Combo Box (Form Control)
– Combo Box (Active X Control)
Excel Data Validation
Lets say we want to create a drop down box that only allow users to choose fruit name.
Create a worksheet named “data” in which we put our Combo Box values inside, type the fruit name in column A.
You can also create a dynamic Name Range with number of row expanding depending on number of data you have input.
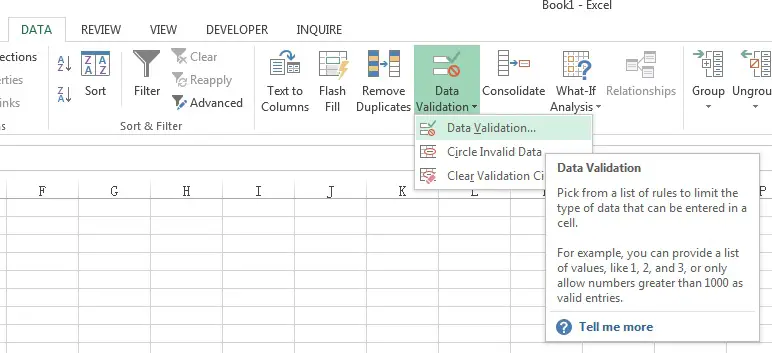
In worksheet “Sheet1”, select Cell A1, select tab DATA > Data Validation
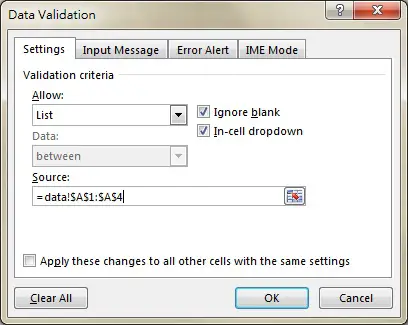
Under Settings, select List for Allow, and then select the data Range in Source.
If you use Name Range for Source, use INDIRECT Function.
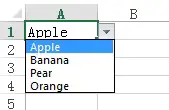
Now you can select a fruit in Cell A1.
If you type a value not in the list, an error message will prompt. You can customize the error message / message box in Input Message /Error Alert tab.
Note carefully that users can bypass data validation by copying and pasting a Cell to the data validation Cell. In that case, you can consider using Combo Box (Form Control) or Combo Box (ActiveX Control).
Combo Box (Form Control)
There are two types of Combo Box: Form Control and ActiveX Control, both are very similar.
Click here if you want to know the difference between ActiveX Control and Form Control.
Click here if you cannot find the Developer tab.
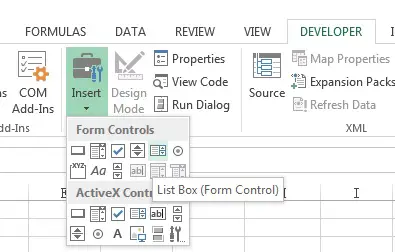
To insert a Combo Box (Form Control), click on DEVELOPER tab > Insert > Combo Box (Form Control)
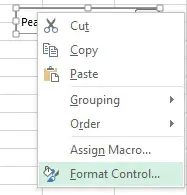
Right click on the newly created Combo Box, select Format Control
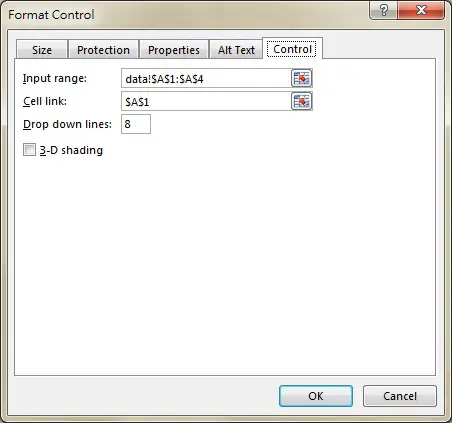
Input the values as follows
Input Range is your data source for combo box
Cell link is where you want the selected data to display in worksheet. Note that the order number in the list is displayed but not the actual value.
Click on OK.
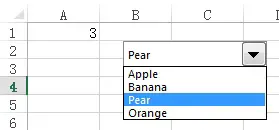
Now when we select Pear, 3 is displayed in A1
You can right click on the created Combo Box, select Assign Macro to trigger a Change Event (triggered when a different value is selected)
Combo Box (ActiveX Control)
Generally speaking there are two major differences between Combo Box (Form Control) and Combo Box (ActiveX Control):
– For Combo Box (ActiveX Control), source data range and linked Cell are selected in Property box for , and there are many more Properties to customize
– Combo Box (ActiveX Control) allows you to create a list of Event while Combo Box (Form Control) allows you to trigger only on change of value (same as Change Event).
Overall, if you don’t know VBA, use Form Control is easier; otherwise ActiveX Control is better.
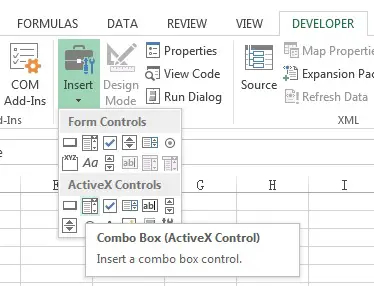
To create a Combo Box (ActiveX Control), click on DEVELOPER tab > Insert > Combo Box (ActiveX Control)
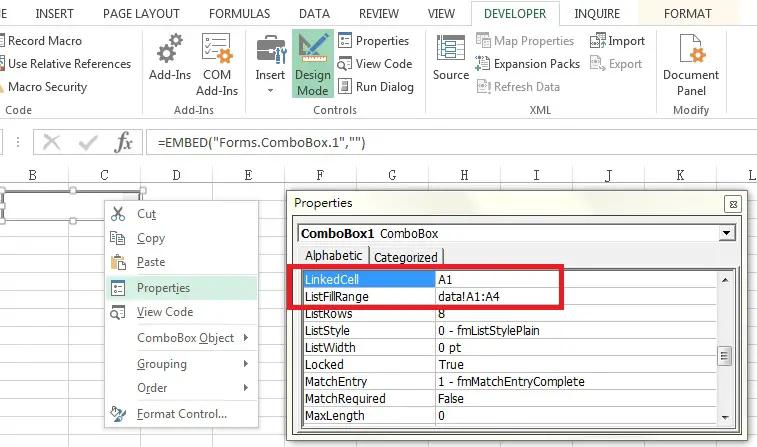
Right click on the newly added Combo Box > Properties
In Properties, fill in the information as below
LinkedCell is where you want the selected data to display in worksheet
ListFillRange is your data source for combo box
Quit Design Mode (by clicking on the Design Mode button).
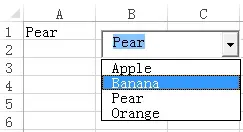
Now whenever you choose a value in Combo Box, A1 shows the same value.
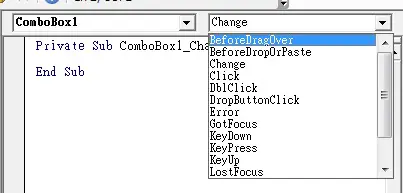
To trigger an Event after you select a value in Combobox, double click on the Combobox in Design View, then you will enter into VB environment and a change Event is created for you
Private Sub ComboBox1_Change()
End Sub
To trigger an event, say if you want to trigger a message box when users select an apple, then you can type
Private Sub ComboBox1_Change()
  If ComboBox21.Value = "Apple" Then
      MsgBox ("You have selected an apple")
  End If
End Sub


