
This Excel tutorial explains how to change default Excel Date Format from Change Date and Time Format in Control Panel.
How to Change Default Excel Date Format
In the country I live, we normally use date format dd/mm/yyyy. However whenever I work for the US company, the system defaults to mm/dd/yyyy. This is annoying and it causes Excel error. For example, if I mistakenly type UK format 31/12/2019, the date will be recognized as a text because there is no such month as 31. It is even risky if you don’t see this error as you are not aware that you have mistakenly input a wrong date. Although you can simply use Text Function to change the date format, it is just a one time solution and it does not address the issue every time you create a new Workbook.
This tutorial will explain how to change default Excel date format from Windows setting. The change does not just apply to Excel but all the related Windows environment. Note that if you are not a Windows administrator, you may not be able to make this change.
Example – Change Default Excel Date Format in Control Panel
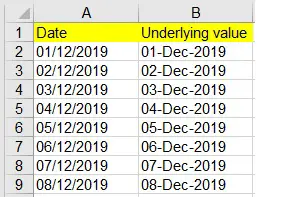
Suppose we want to change default Excel date format from dd/mm/yyyy to mm/dd/yyyy.
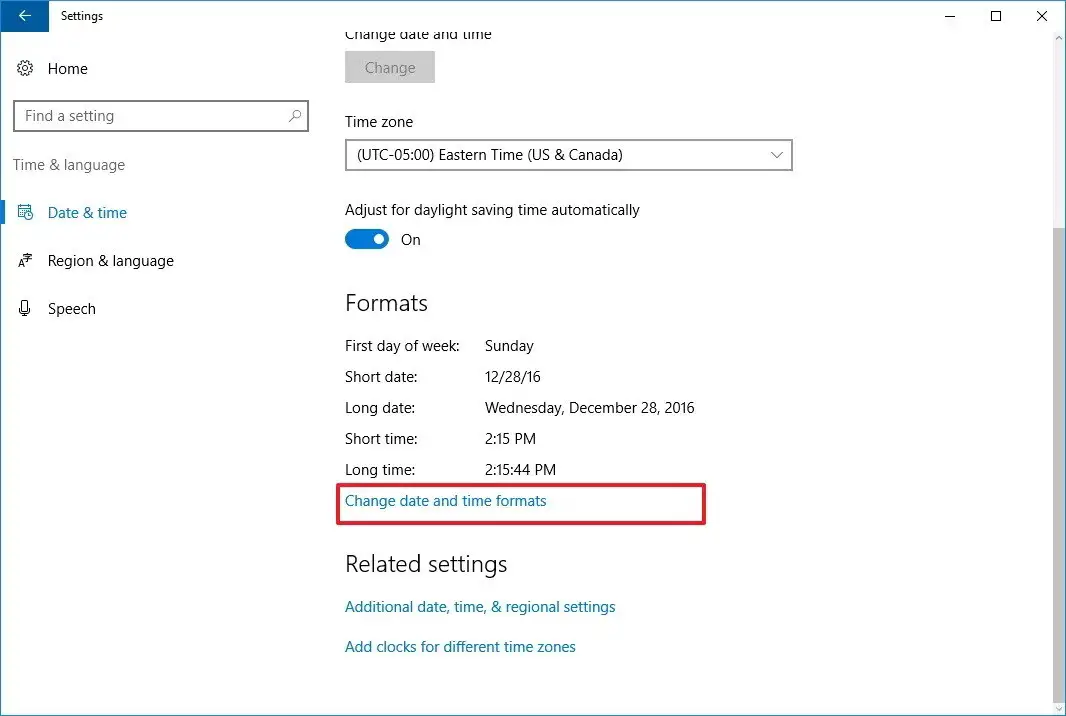
In Windows 10, navigate to Control Panel > Date and Time > Change Date and Time Format
Even if you are using older versions of Windows, the navigation maybe a little bit different, you can still find this option.
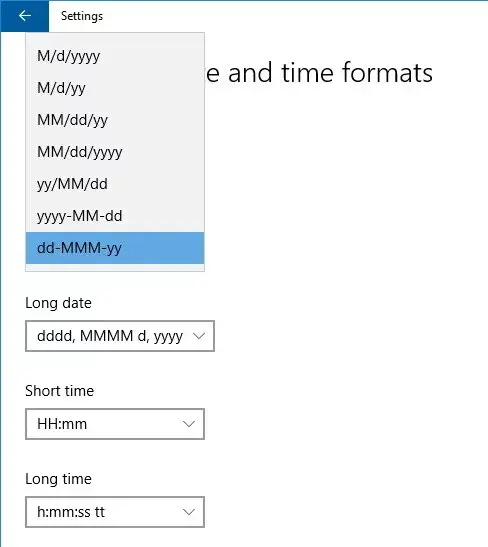
The Short Date format is currently displaying dd/MM/YYYY, now change to MM/dd/yyyy.
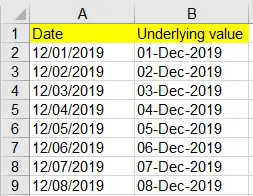
Go back to Excel spreadsheet, the value in column A automatically changed.
This makes complete sense because if the date format doesn’t change, all your existing workbooks will be messed up.
Outbound References
https://support.office.com/en-gb/article/text-function-20d5ac4d-7b94-49fd-bb38-93d29371225c